
My Herbs Blog |
|
9/27/2020
How to Make an Herbal Dream Pillow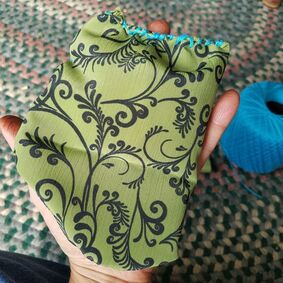 This "how to" is not a spiritual exercise, but I guess it could be if you should choose to see it that way. I won't be getting into the science of aromatherapy. This is just an exercise for fun, and relaxation, and to enjoy the fragrance of plants and herbs. I also wanted to do this exercise, because I wanted to teach my boys how to sew, and I thought it would make a great sewing project. What you need to do this: 1. HERBS- I used Lavender, Rose petals, Chamomile, Mugwort, Lobelia, Hops, Spearmint, Peppermint and Boneset. To be honest, I kind of wanted to use up some herbs I had had a little while. All herbs listed here, except for the Boneset and Lobelia sitting for a few months. Although herbs can last years if store properly, I do not like to have my herbs sit and sit. The Lobelia and Boneset were wildcrafted at a creek bed, and I had dried quite a bit, so I decided to add a little to the mixture. The Hops was in powder form, because that is what I had, but I would really recommend HOPS flowers. I did not use a specific recipe, but for the purpose of this post, I will give you one so you know what to do! When I give parts, I will give part the value of 1 ounce. Ingredients: 2 parts Rose petals 2 parts Lavender petals 1 part Chamomile flowers 1 part Mugwort 1 part Spearmint 1 part Peppermint 1/2 part Hops flowers, or clusters 1/4 part Lobelia (optional) 1/4 part Boneset (optional) ** You can add any other herbs you want to this mixture. The more fragrant flowers you add, the more fragrant your dream pillow. 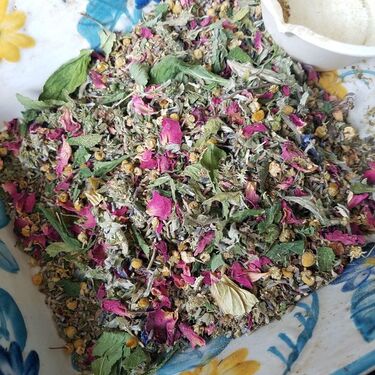 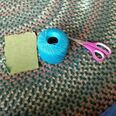 BI always mix my herbs in ceramic, or pottery dishes. You can use wood, glass, or other natural material. I believe that all life forms, and plant do have life- emit an energy force. I like to use natural materials, because they have more life energy, than say- plastic. You will also need fabric. I suggest choosing fabric that is not too thin, or too thick (like flannel). You want it to breath, so you can smell the herbs. Choose something soft and appealing. I chose to use bigger needles and crochet yarn, which is about the thickness of embroidery floss. I wanted my kids to sew with bigger needles and thread, because it is easier to learn to sew with bigger tools. I found that this worked out really well. I cut the squares to sizes 4 x 5 inches (approximately). You can choose any size you want! Usually they are smaller, but it really depends on the size you want to make. I told my kids to fold their cut fabric, hamburger style and with the pattern facing inward. We sewed three sides, and then flipped the fabric, inside out which really made it the correct way, and then stuffed the fabric with our herbs. We premeasured all the herb mixture to determine how much we wanted to use for each pillow. We wound up with 7 cups, and made 7 pillows. To be honest, I would have liked to use more herb in my pillow for the size 4 x 5". I think 1 1/2 cups would have been better. The last simple step, is just to sew up the final side. Yeah! Then put it on your pillow or in your pillow case, or even beside your bed. The fragrance is a welcome delight when you arrive to bed, and wake in the morning. Below is the video I made on this DIY project. If you make your own, please come back and comment. Have a blessed day! |
AuthorJenel Schaffer Videos on YouTube Archives
April 2021
CategoriesAll Art & Healing Books Dried Herbs Fresh Herbs Gluten Free Herbal Beauty Herb Consultations Homeschool Positive Mind Recipes Root Herbs Self Care Spirit Tea Watercolor |
 RSS Feed

|

Best place for bulk herbs and spices□
|

My Young Living Website
 Jake Ducey 10K in 10 Weeks Jake Ducey 10K in 10 Weeks
Copyright Jenel Schaffer, Sheep Hill Herbs LLC, 2020-2023 🌲🌳 |
Rosemary Gladstar's "The Science and Art of Herbalism Course"
Sheep Hill Herbs LLC
347 Godfrey Street Rehrersburg, PA 19550 |

My Etsy: Sheep Hill Herbs
|